Quick Start
This guide aims to provide a comprehensive walkthrough on how to get started with Flagbase, a powerful feature flagging and rollout management platform. By the end of this guide, you will be able to create, manage, and control feature flags in your application using Flagbase.
Step 1. Creating your Feature Flags in Flagbase
-
Register to receive access credentials. These credentials will allow you to connect to the instance. Currently, the cloud service is invite-only. If you wish to receive access, fill out this form.
-
Connect to the cloud instance of Flagbase Core, via the Client. You can think of the client like a database viewer, but for managing your feature flags! All your connection information is stored locally on your browser when using the web version of the client.
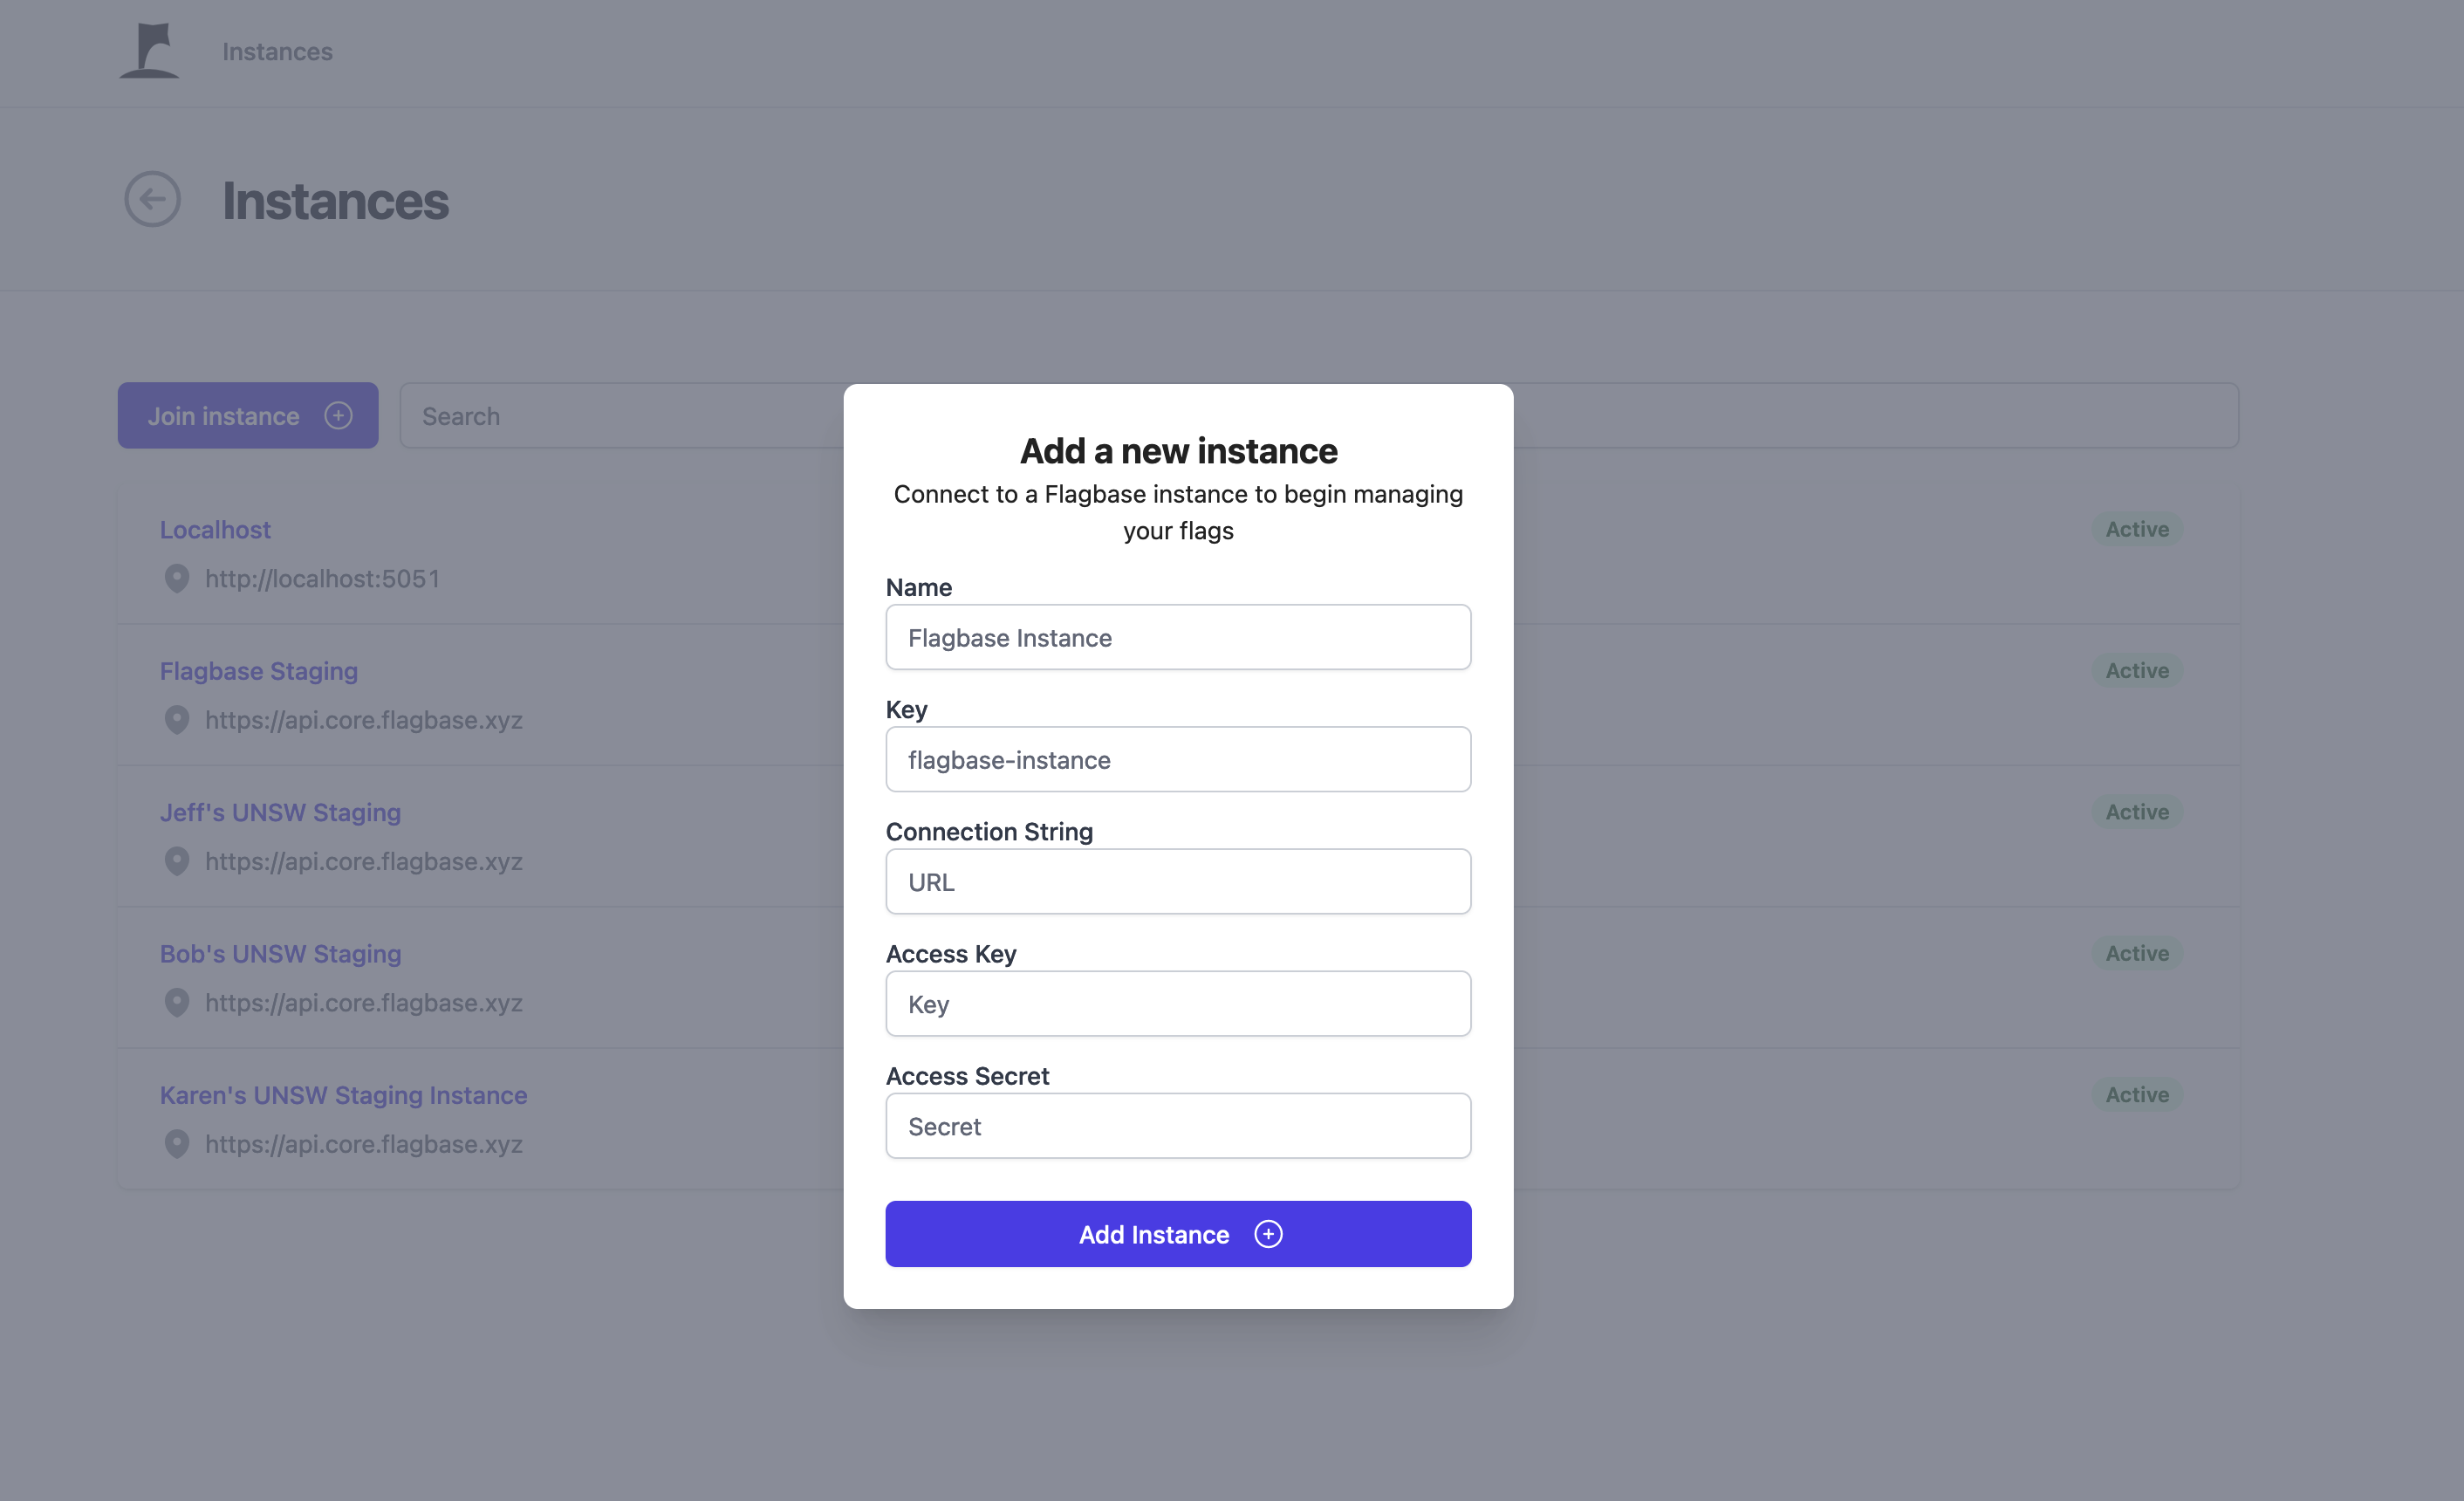
To connect to an instance, click on the "Join Instance" button. Then fill out the instance details.
- Name: Name of the instance (e.g. Flagbase Cloud)
- Key: Unique identifier to reference instance (e.g. cloud). Don't worry, this is only used as a local reference to your instance connection. It's not saved on Flagbase.
- Connection URL: This is the connection URL used to connect to your instance. If you wish to use the cloud instance, you should use (
https://api.core.flagbase.com) - Access Key: This is a unique key. You can think of this like a username, however it's not completely the same.
- Access Secret: Similarily, you can think of this like a password. Please be sure to not expose this secret to the public.
 After connecting to the instance, you can navigate to the flags page by going to Workspace -> Project -> Flags
 Once you are in the flags page, you can proceed to create a feature flag.
- Click on 'Create New Flag' to start the process of creating a new feature flag. You will be prompted to provide a unique flag key, a description, and any additional metadata.
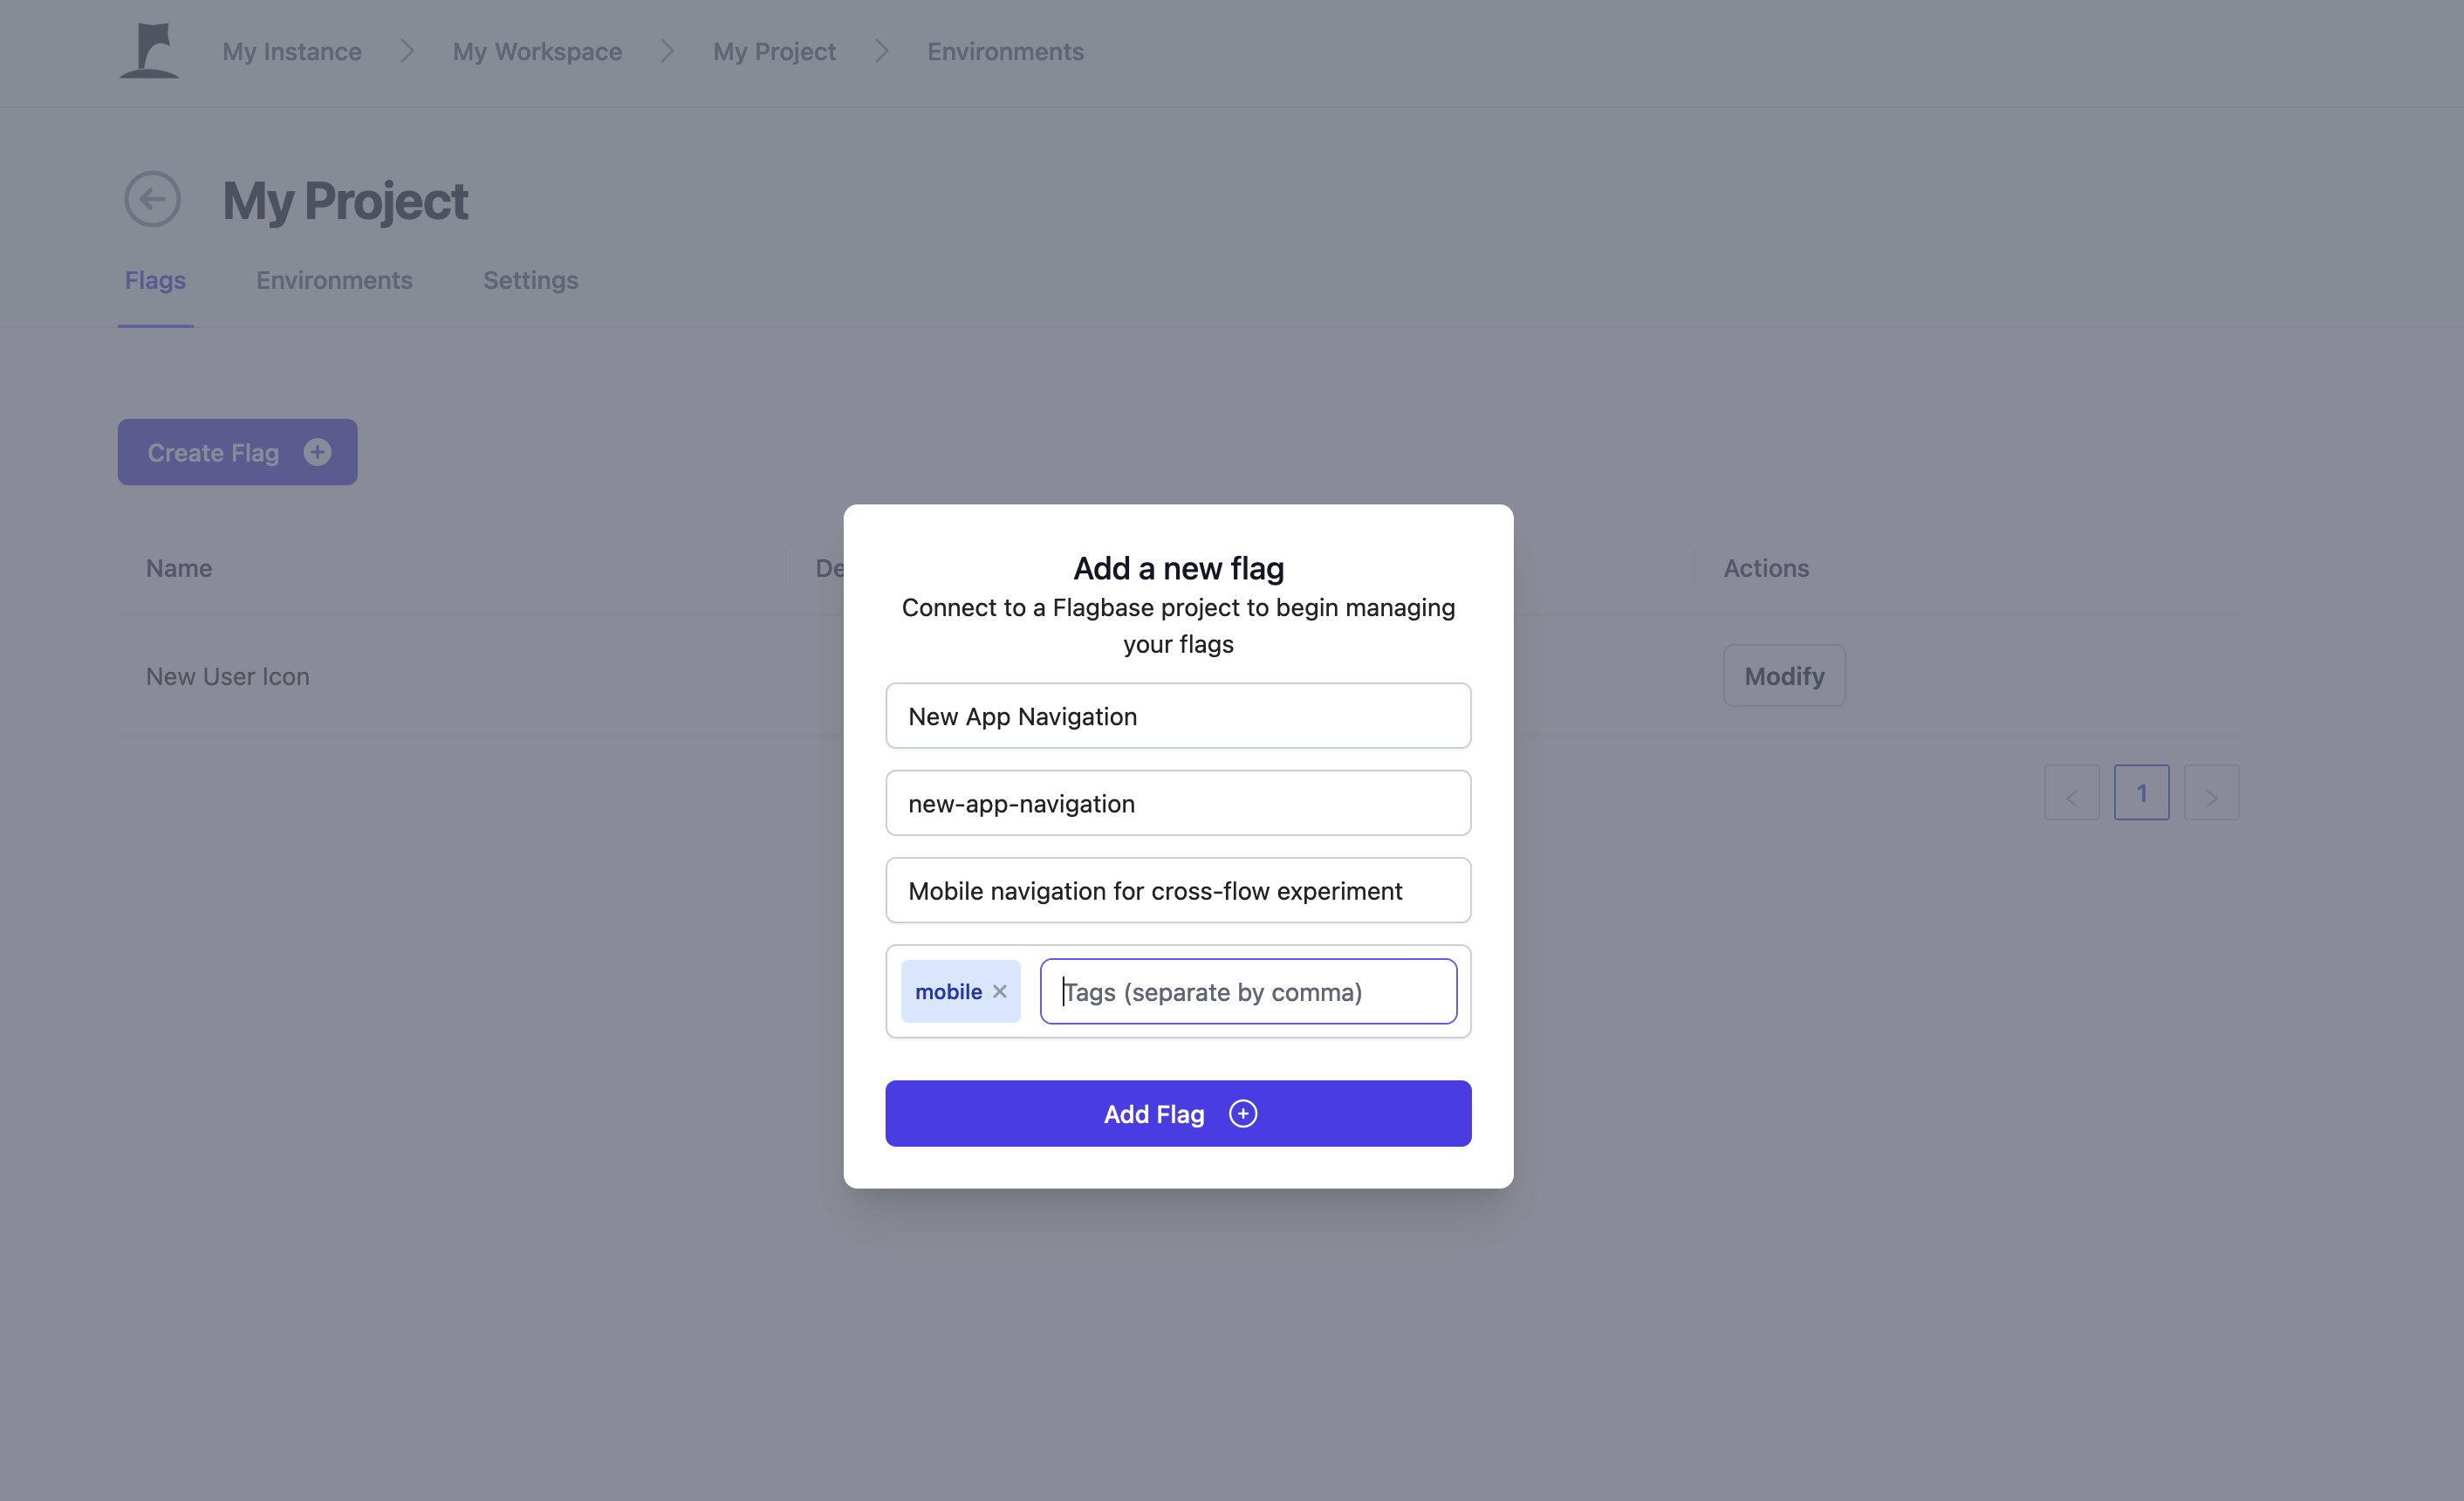
- Save your feature flag. It will now be available in the Flagbase dashboard for further management.
You can now proceed to start using your feature flag in code.
Step 2. Setting up the SDK in your application
- Install the Flagbase SDK for your specific programming language or platform. You can find the installation instructions and relevant documentation in the SDKs documentation.
- Javascript
- React
- Python
Using npm:
npm install @flagbase/js-client-sdk
Using yarn:
yarn add @flagbase/js-client-sdk
Using npm:
npm install @flagbase/react-client-sdk
Using yarn:
yarn add @flagbase/react-client-sdk
Using pip:
pip install flagbase
- Retrieve your Flagbase SDK key from Flagbase Client.
You can find the server and client keys from:
Workspace -> Project -> Environments (tab) -> Production -> SDK Keys
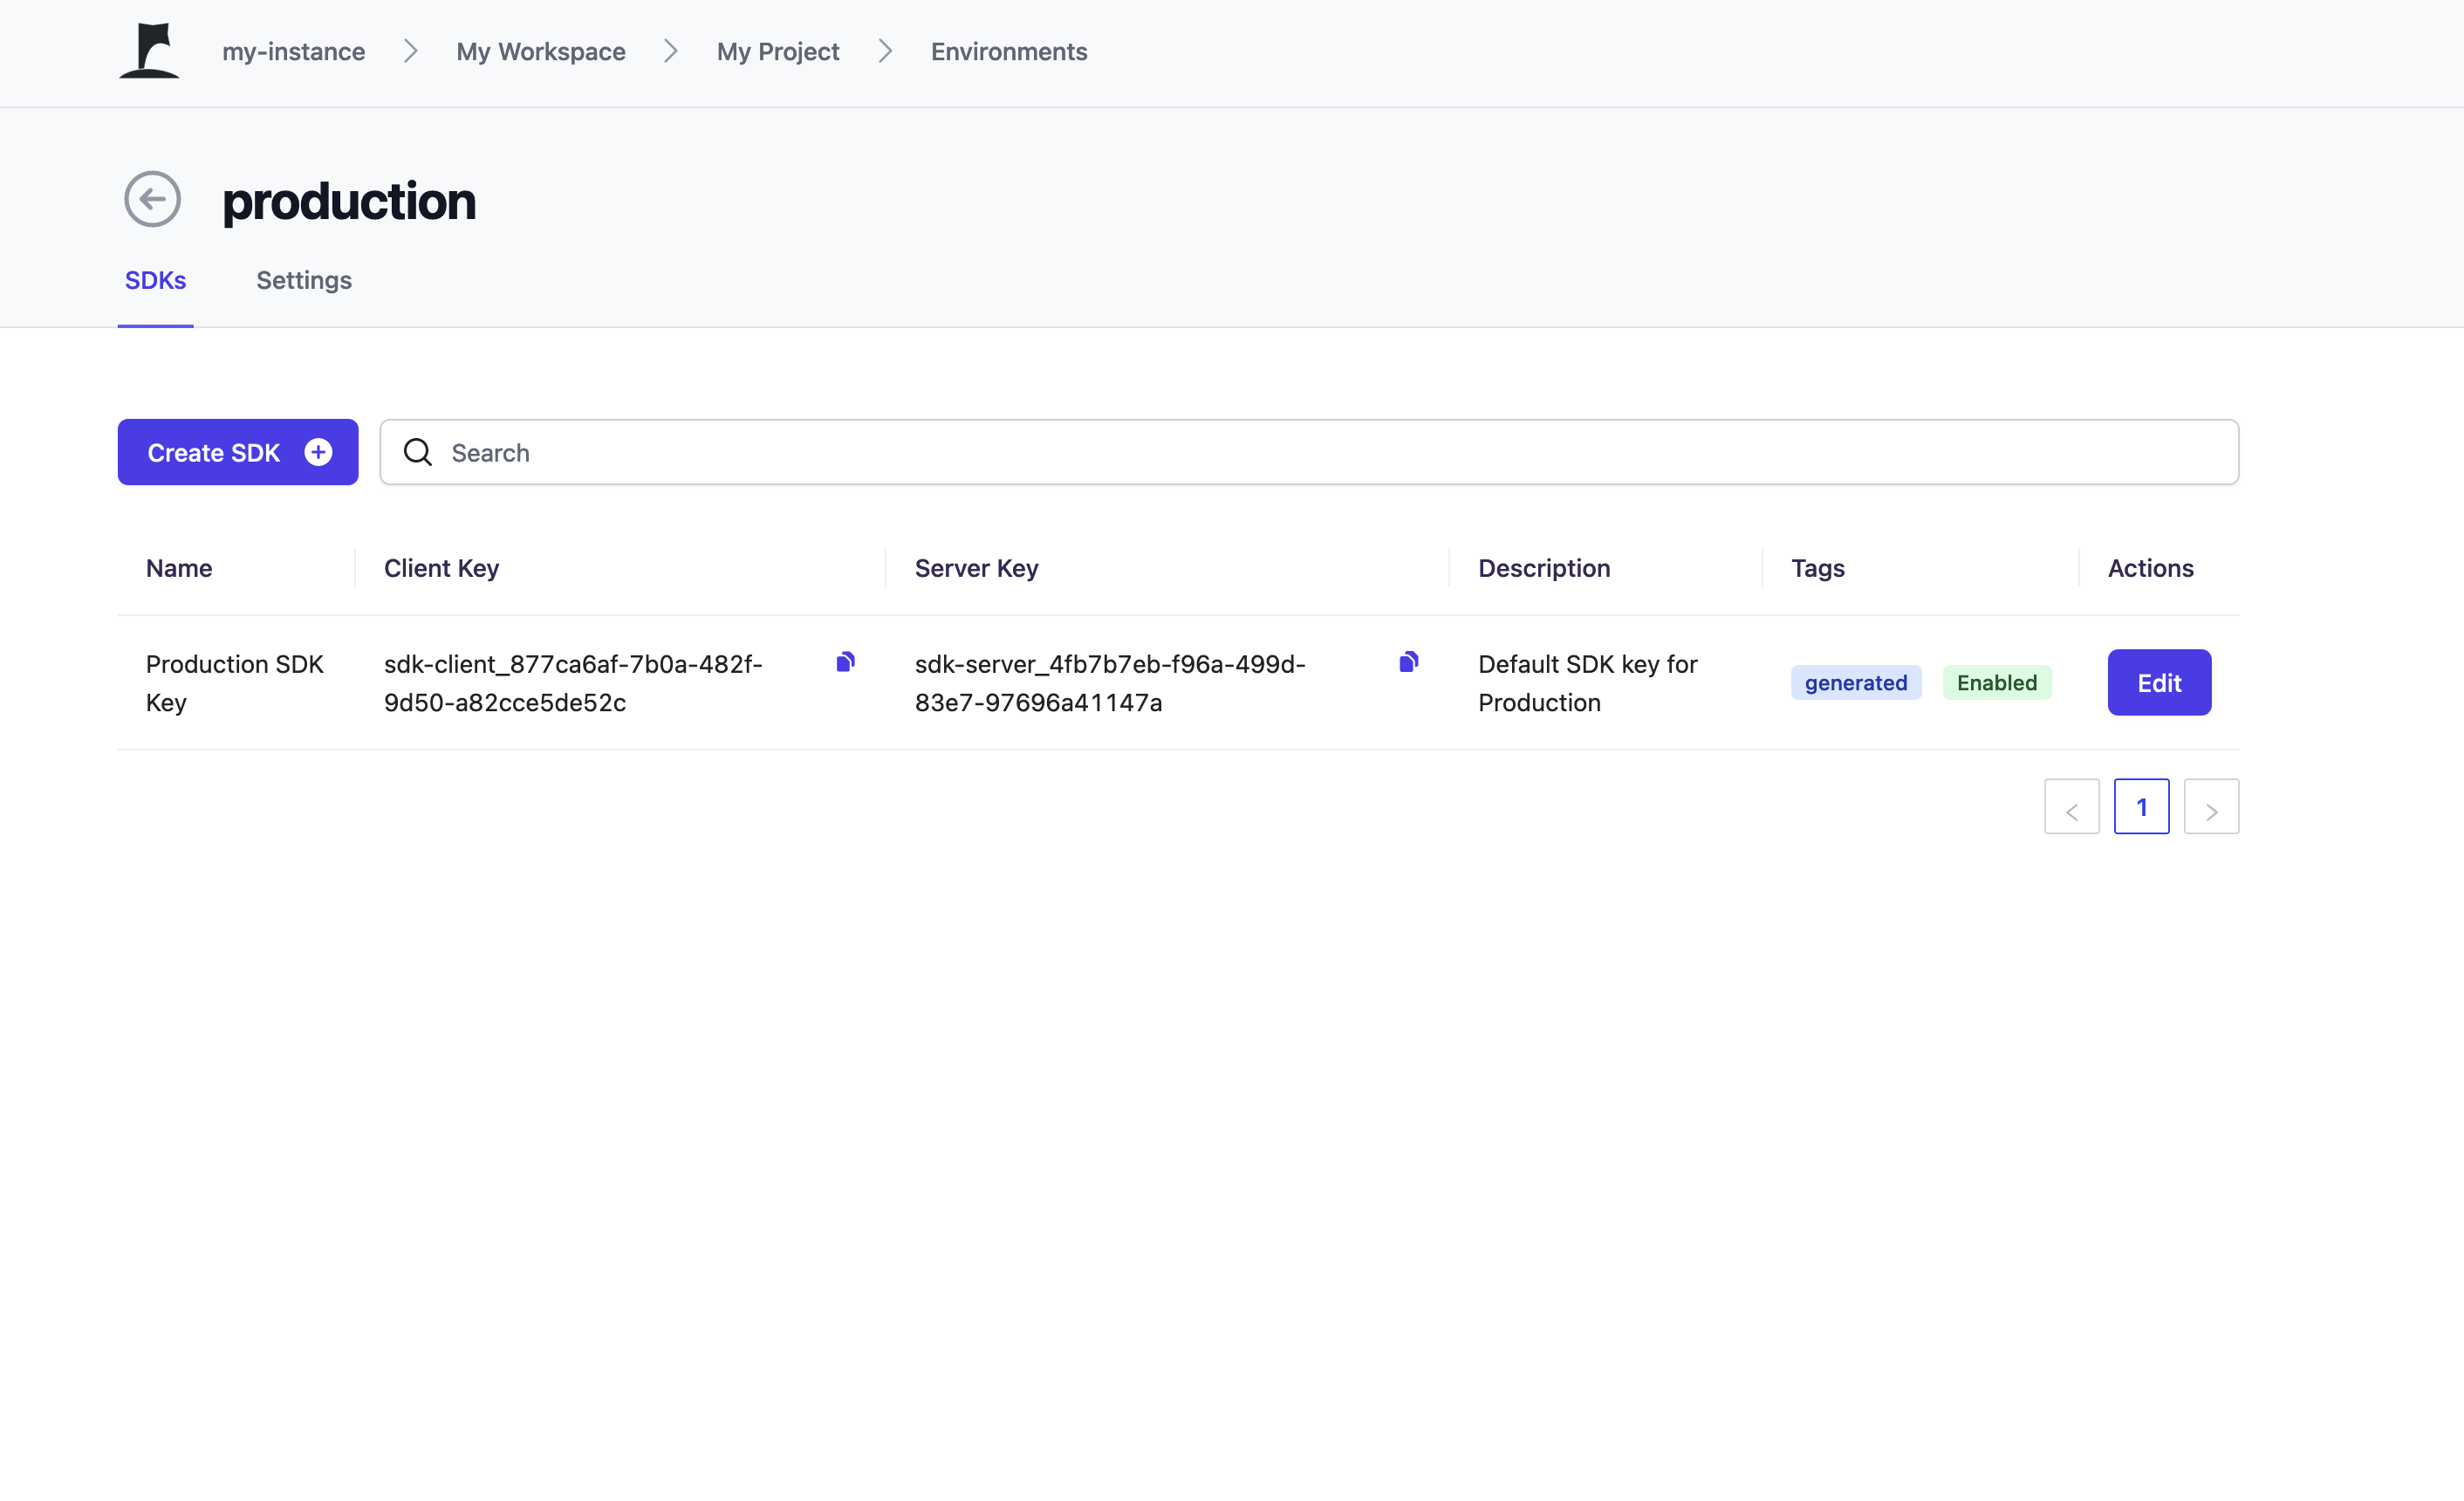
- Import the SDK in your application and configure it with your Flagbase SDK key.
IMPORTANT For client SDKs (react, javascript etc) be sure to use the client key and vice versa for server SDKs (python, node, golang etc).
- Javascript
- React
- Python
import Client from "@flagbase/js-client-sdk";
import FlagbaseProvider, { useFeatureFlag } from "@flagbase/react-client-sdk";
from flagbase import FlagbaseClient, Config, Identity
- Initialize the SDK by creating a new instance of the Flagbase client. This will allow you to interact with the feature flags you have created in your Flagbase dashboard.
- Javascript
- React
- Python
const client = Client("your-client-sdk-key", {
  identifier: "your-identifier",
  traits: {
    "your-trait-key": "your-trait-value",
  },
});
function App() {
  return (
    <FlagbaseProvider
      clientKey="YOUR_CLIENT_SDK_KEY"
      identity={{ identifier: "USER_ID", traits: { age: 25 } }}
    >
      <MyApp />
    </FlagbaseProvider>
  );
}
flagbase = FlagbaseClient(
    config=Config(
        server_key="sdk-server_491e7607-dac2-41dc-abed-1ba904cdb032"
    )
)
Step 3. Wrapping your code with feature flags
-
Identify the parts of your application that need to be controlled by feature flags. These could be UI elements, API calls, or even entire features.
-
Wrap the relevant sections of your code with conditional statements that correspond to the flag state. This will enable or disable the respective feature depending on the state of the flag. Refer to the SDKs documentation for specific instructions.
- Javascript
- React
- Python
const variation = client.variation("your-flag-key", "control");

if (variation === "treatment") {
  // Execute the feature flag enabled code
} else {
  // Execute the feature flag disabled code
}
function MyComponent() {
  const isFeatureEnabled =
    useFeatureFlag("MY_FEATURE", "control") !== "control";

  return (
    <div>{isFeatureEnabled ? "Feature enabled!" : "Feature disabled."}</div>
  );
}
# user details might be pulled from your database
user = Identity(
    "some-user-id",
    {"some-trait-key": "blue"}
)
show_feature = flagbase.variation("example-flag", user, "control")

if show_feature == "treatment":
    show_my_new_feature()
else:
    show_existing_feature()
Step 4. Controlling what users see what in your application
-
You can target users by navigating to the 'Feature Flags' page and click on your desired flag (i.e. Workspace -> Project -> Flags)
-
Configure targeting rules for your flag, which determine the criteria for enabling or disabling the feature. These can be based on user attributes, such as age, location, or any other custom attributes that you define
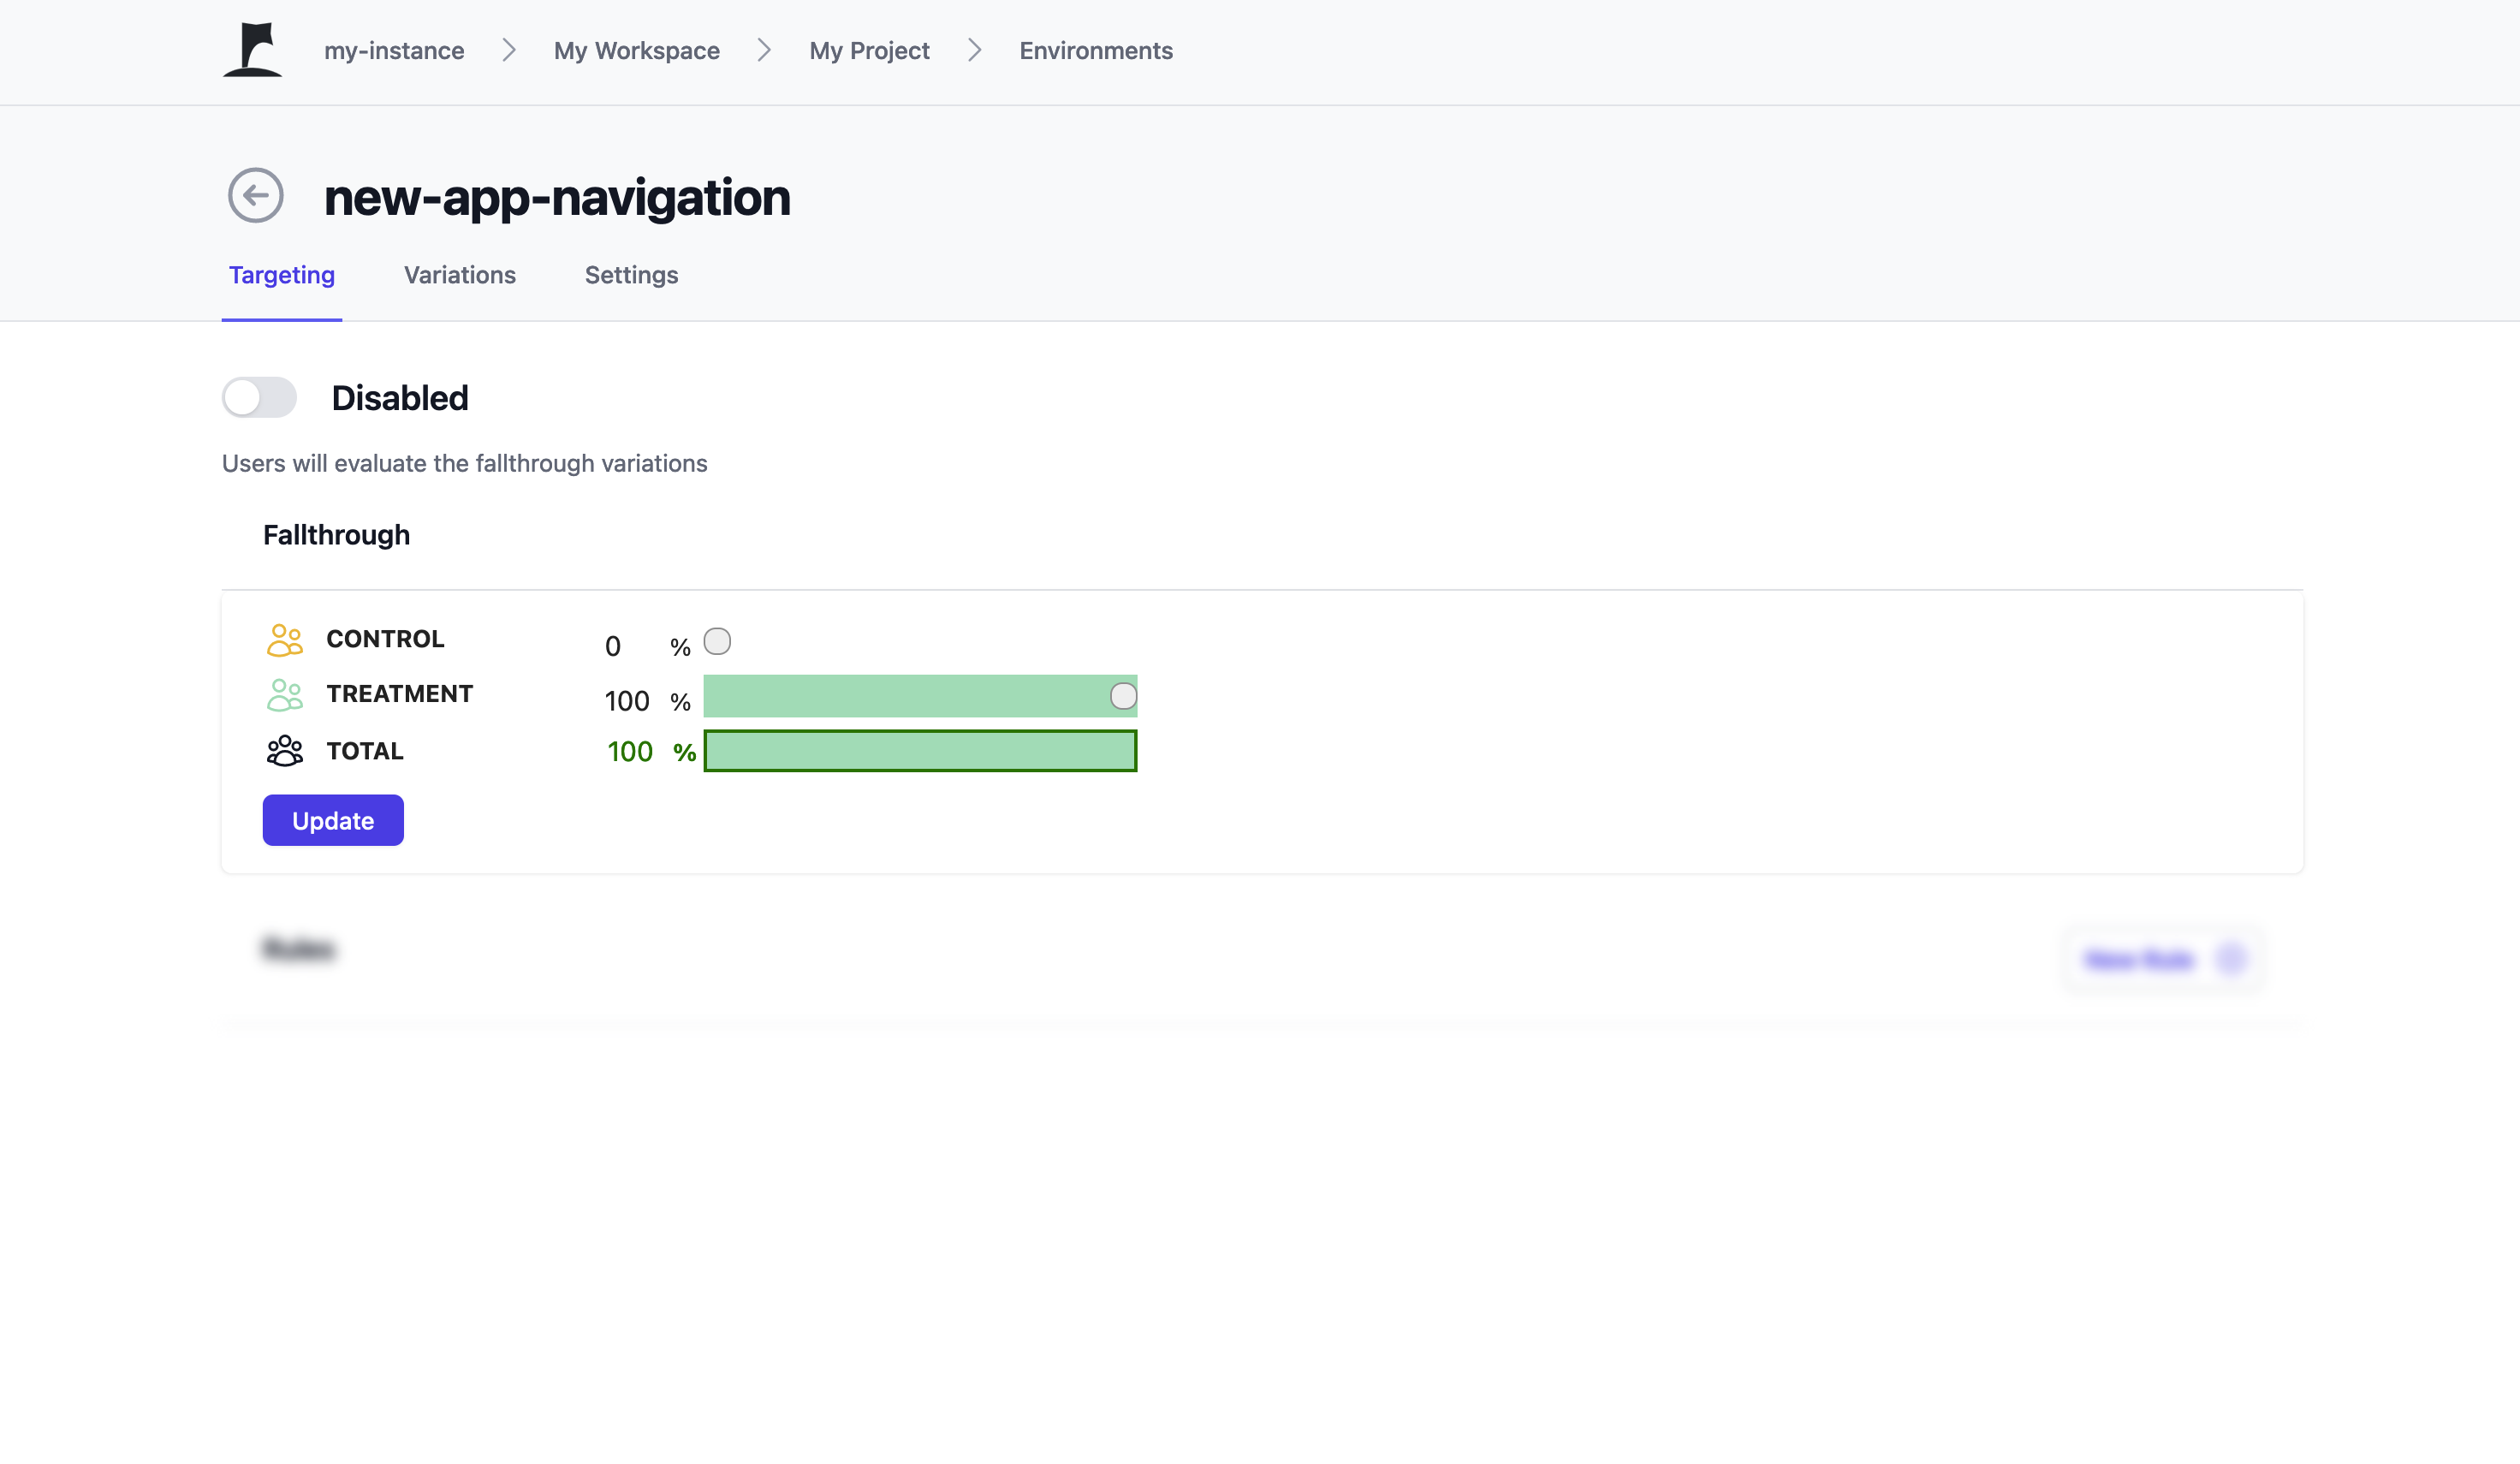
When you initially create a flag, targeting is disabled. When your flag is disabled, it will serve the fallthrough rule. By default your fallthrough rule will target 100% of the control variation.
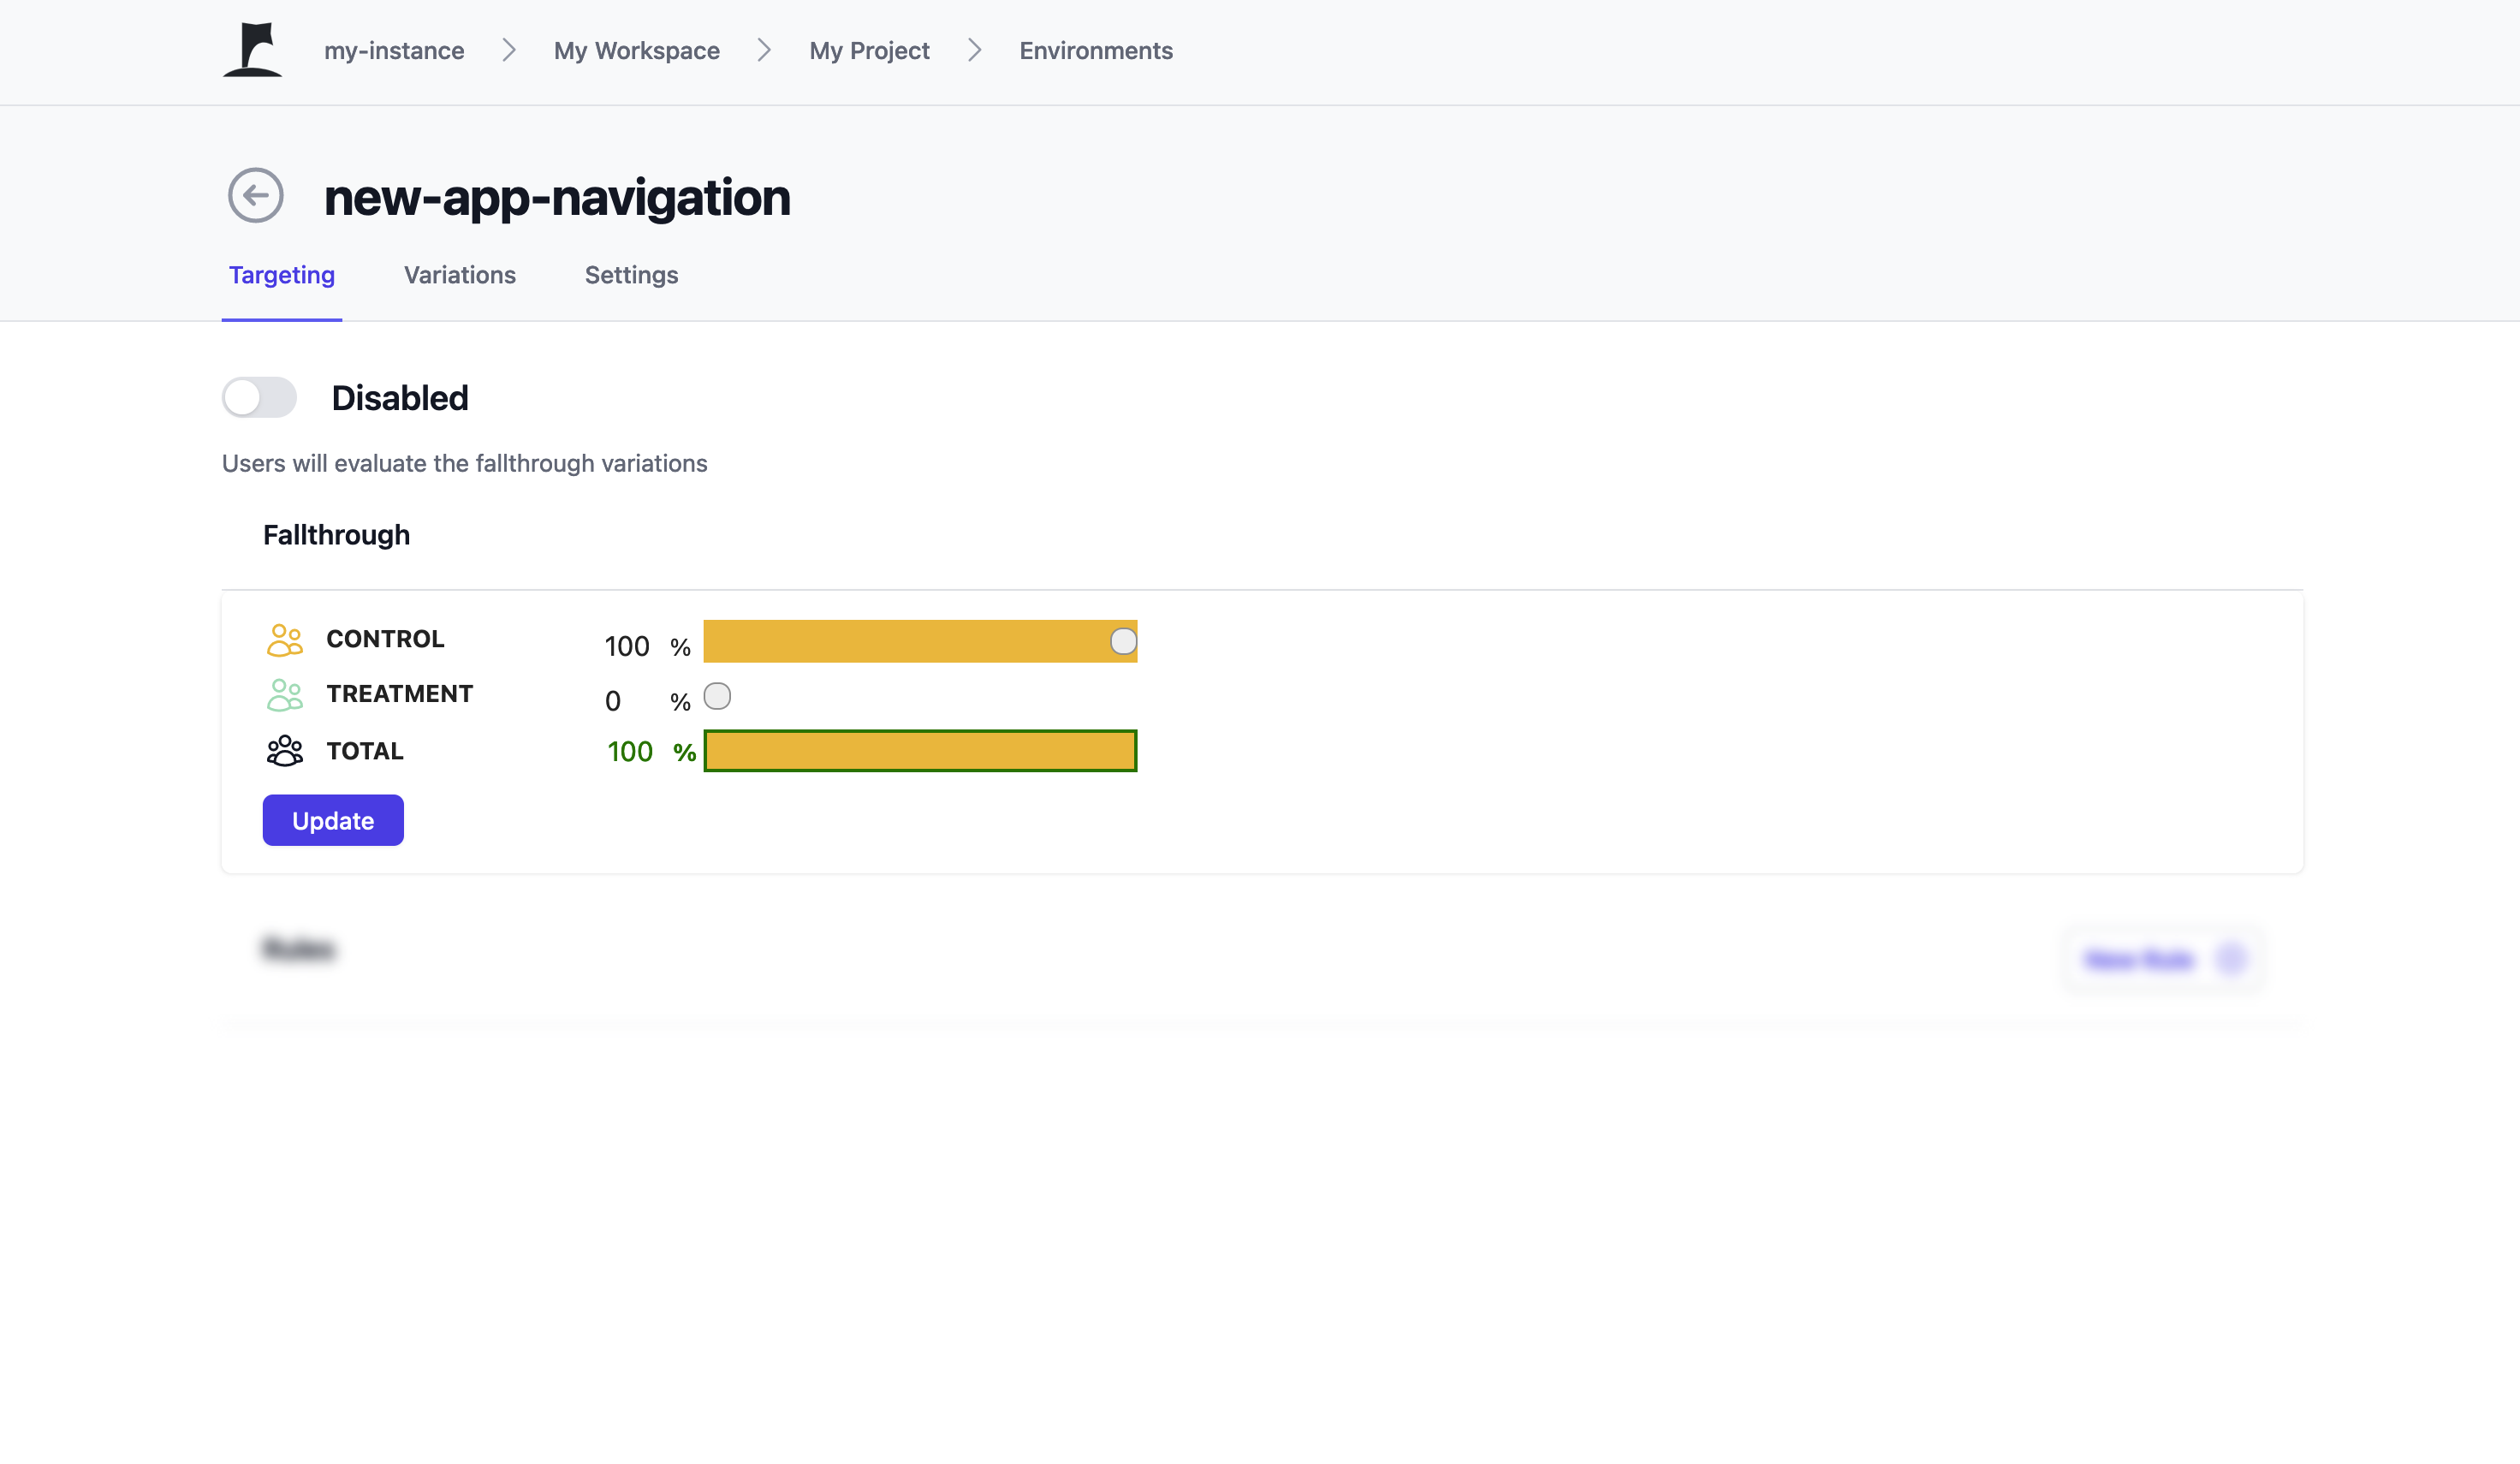
If you wish to serve the treatment variation when targeting on your flag is off, you need to set the control variation to 0% and the treatment variation to 100%.
Upon enabling the targeting on your flag, the rules below the fallthrough rule will be evaluated to determine what your users see. If none of the rules are matched, the fallback rule at the top is evaluated.
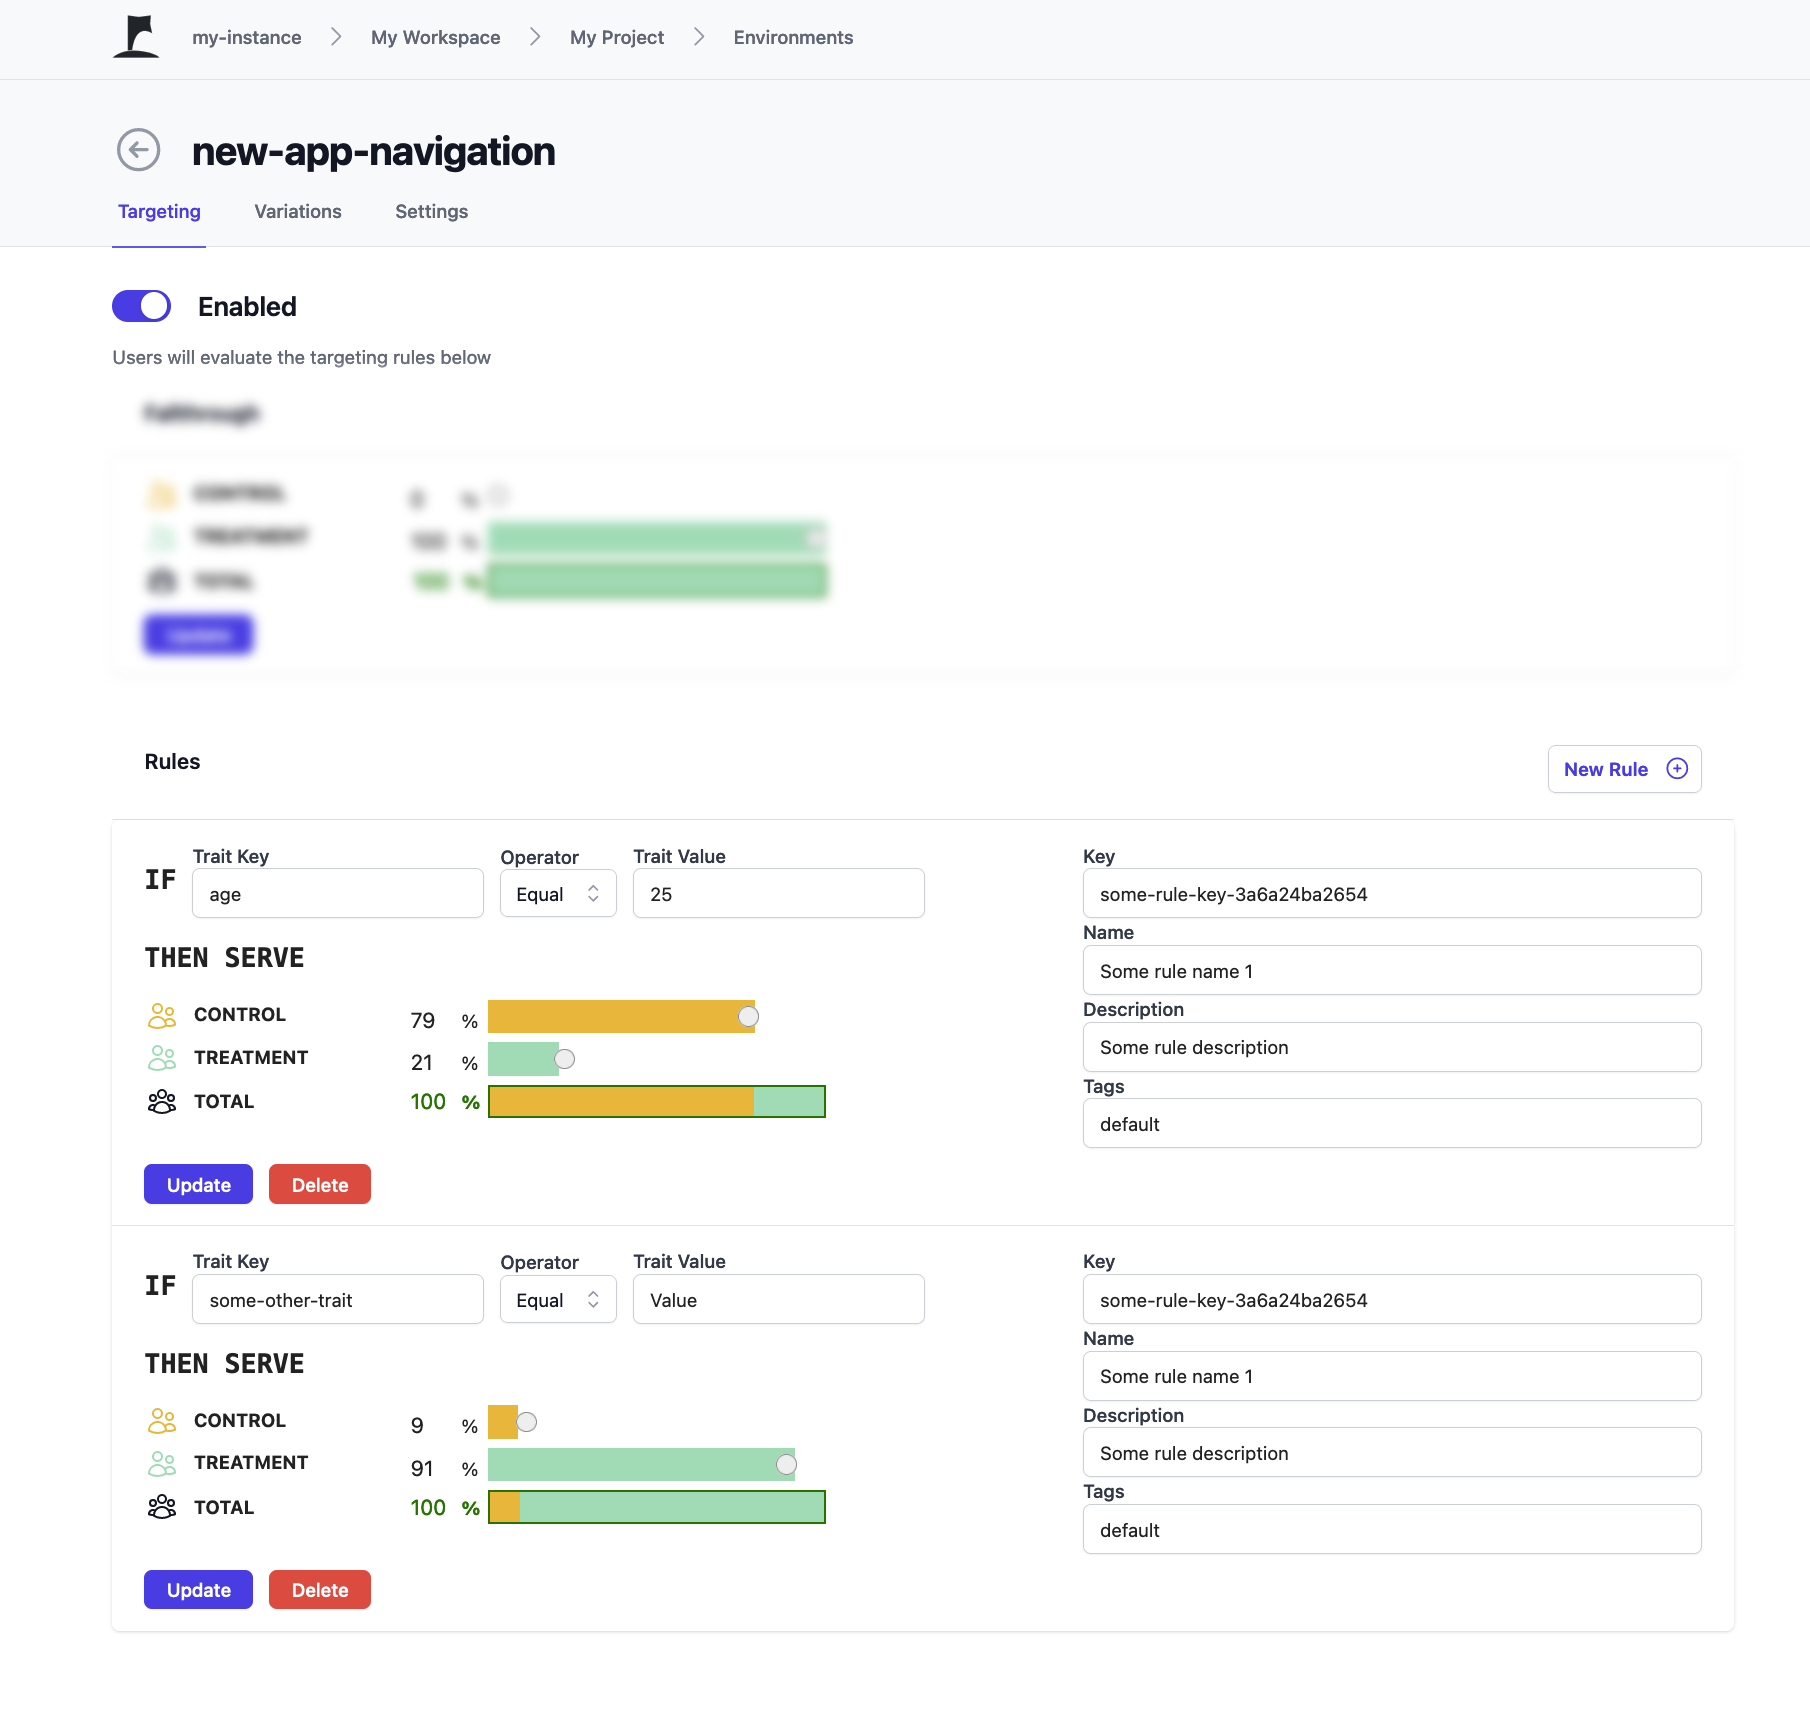
You can use these rules to target specific users different feature variations.
- Save your changes, and Flagbase will automatically update the flag state in your application through the SDK 🥳
That's a wrap
By following these steps, you will have successfully integrated Flagbase into your application and can now leverage the power of feature flags to manage the visibility and functionality of various features. This will enable you to perform controlled rollouts, A/B testing, and more, ultimately improving the user experience and the overall quality of your application.